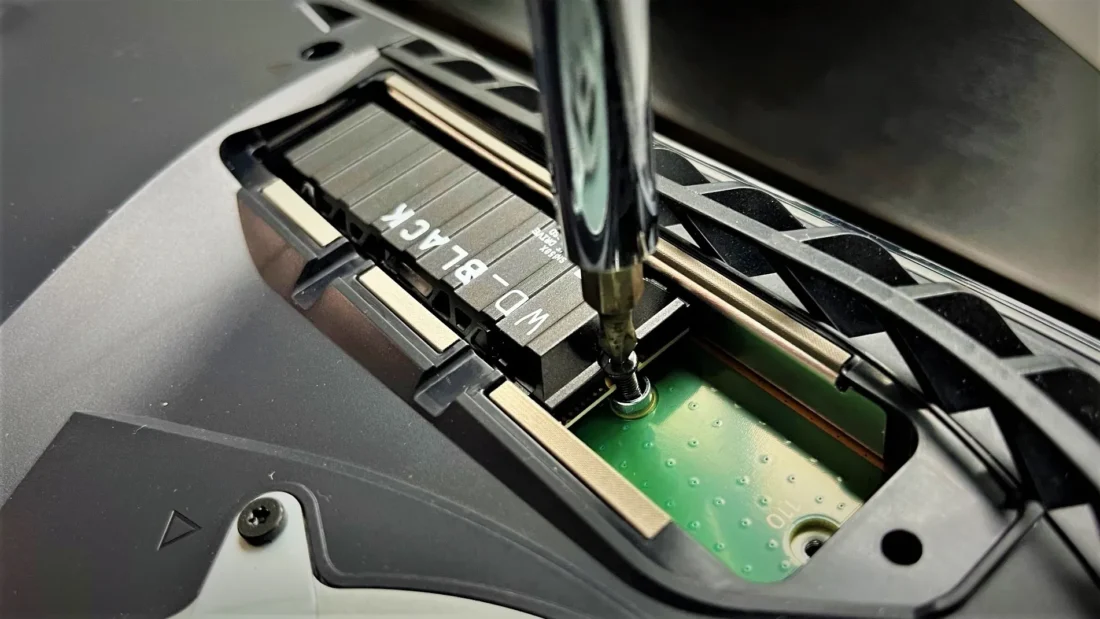
Expand Your Horizons: How to Increase PS5 Storage with an Internal SSD
Upgrading the internal SSD of your PlayStation 5 (PS5) meaningfully increases the storage space, so you can download more games and enjoy them without difficulties. This upgrade is no longer considered as just a privilege; for some gamers, it has become a must. The default PS5 storage is really fast but its capacity is soon overwhelmed by the ever-increasing size of many games and updates. We have provided a detailed guide in this article, enabling you to expand your PS5 storage with confidence and ease.
Prerequisites
- An M.2 NVMe SSD that is PS5-compatible and can be hooked up via the PCI-Express Gen4x4 interface. The SSD speed Sony specifies should have a sequential read speed of 5,500Mbps or faster, a storage size between 250GB to 4TB, and a form factor that complies with PS5’s slot.
- Flat head screwdriver
- An SSD heatsink, if it doesn’t come along with the SSD, dissipates heat convincingly.
You might be Interested
Step-by-Step Installation Guide
1. Making the Right SSD Decision
Make sure the SSD is in line with Sony’s specifications of compatibility. It’s extremely important for the stability and effectiveness of the system. We recommend SSDs like the Western Digital Black SN770 for their balance of affordability and performance.
2. Prepare Your Workspace
Make sure your PS5 is switched off, and the power cord is disconnected from all sources. A clean, undamaged flat surface should be used for this work to avoid damaging your console or losing any tiny pieces.
3. Access the Expansion Slot
- Remove the Side Panel: Position the PS5 with the PS logo facing down and the ports facing you. Then, gently unscrew and separate the side panel by sliding it out. Do not use too much force and carefully remove the clips and make sure they are not broken.
- Remove the Expansion Slot Cover: First of all, locate and loosen the single screw which holds the cover in place and remove the cover of the spot, and you will see the M.2 slot.
4. Installing the SSD
- Prepare the SSD: Add a heatsink onto your SSD if its heatsink is not present. Take time to go through the heat sink’s installation guide and make sure the heat produced is well controlled.
- Insert the SSD: Make sure you properly place the SSD by fitting the notch on the SSD with the console slot. Lay the SSD flat, and insert it at a slight angle, then press it down until it is securely seated.
- Secure the SSD: Use the displaced screw from the expansion slot to hold the SSD to fix it in place. Be certain of proper fit, loose enough but don’t overtighten.
5. Reassembly
- Replace the Expansion Slot Cover: Place the cover on and fasten it using the screw again.
- Reattach the Side Panel: Now, continue by gently sliding the side panel back until a click indicates it’s locked.
6. Formatting the SSD
Power On Your PS5: Set up all cables again and power on your PS5. The program must be configured to recognize the plugged-in SSD and initiate the formatting prompt. Comply with the procedures to format SSD.
7. Adjusting Storage Settings
When the SSD is formatted, you can tinker with your storage setting in the PS5 system menu to determine where the game and apps should be installed into the SSD.
Conclusion
An additional M.2 SSD for the PlayStation 5 exponentially maximizes your gaming experience, making you rid of the chore of juggling space within the console. This update not only expands the space for game storage but also enhances the operability of the console at 100% efficiency by decreasing load times while playing the games. These steps have been tailored in such a way that you can go about this upgrade without any fear or hassle so that your PS5 is in good shape for the ever-changing landscape of the gaming industry. Keep in mind that the gaming world is dynamic, and by adding storage to your PS5, you are able to open a fun door for you and keep on playing without fear of running out of space for gaming.

Pooja Yadav is a Technical Content Specialist with over 6 years of experience. She mostly writes about the tech guides for Tech Hub Digital. She also has an interest in Smartphones, Bluetooth Earbuds/speakers, Wearables and all things gaming.
In her spare time, she watches movies, series and enjoys spending time outdoors.

