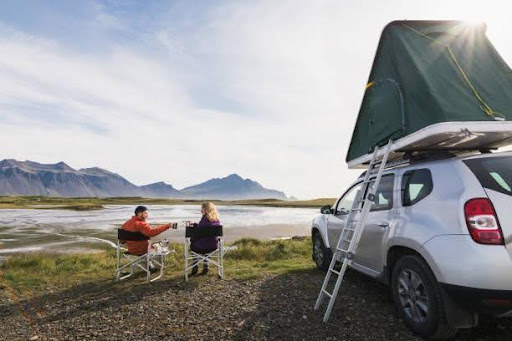
As camping grows increasingly popular, rooftop tents have emerged as a sought-after upgrade that delivers unique versatility. They blend rugged outdoor adventure with the comfort and refuge of an elevated shelter. Sleeping on the hard ground can be unpleasant for those accustomed to mattresses back home.
Rooftop tents, however, bridge the divide. They tuck neatly into transit cases while the vehicle is in motion. Then, with a flip of a switch, they unfold atop suitable vehicles into sleeping sanctuaries raised off the ground below. This allows campers to have the best of both worlds – epic outdoor experiences without sacrificing all the comforts of home when it’s time to rest.
This guide explores the versatility of rooftop tents, examining buying considerations, setup best practices, and creative customizations to optimize the elevated camping experience.
Why Rooftop Tents?
For passionate campers who love regular escapes immersed in nature, a high-quality rooftop tent solves critical discomforts traditionally inherent to extended adventures. They provide breathable overhead shelter on raised platforms, delivering cozy mattress cushioning. This allows for restored personal space to relax after full days of hiking trails or rivers. Just park and elevate into the evening.
Additionally, suspending sleeping quarters above the shaded forest floor mitigates risks posed by ground pests like snakes, scorpions, and spiders who nest in the bush. Also, the elevation of the rooftop tent deters curious bears or prowling coyotes that might otherwise be drawn in by food aromas and ravage unattended campsites overnight.
Factors to Consider Before Purchasing A Rooftop Tent
The wide range of shapes, sizes, and features in rooftop tents requires buyers to thoughtfully prioritize needs before purchasing. There are several key considerations to weigh. Below are some of the factors to consider before buying a rooftop tent.
Material and durability
When choosing a tent fabric, consider factors such as durability, weight, breathability, and cost. Canvas is a classic, durable option, albeit heavier. Modern tents often utilize lightweight polyester and nylon blends with protective coatings for weather resistance.
Ripstop reinforcement enhances tear resistance, while premium materials like silnylon or Dyneema offer improved repellency and strength-to-weight ratio. Acrylic coatings or polyurethane reinforcement can enhance weatherproofness. Compare fabric characteristics like cotton, polyester, nylon, silnylon, or advanced composites to find the optimal balance based on specific needs for ventilation, transport, and resilience.
Tent size and capacity
When choosing a rooftop tent, it’s important to factor in both the number of occupants and their needed space for a comfortable sleeping arrangement. Tents come in a wide range of sizes to accommodate everything from solo campers to full families. For solo campers, compact 1-2 person tents (30-50 sq ft) suffice, offering cozy quarters. Couples may opt for 2-4 person tents (60-100 sq ft) for added stretch room, while larger family-sized tents (100+ sq ft) accommodate 4-6 persons up to 10+, providing flexibility in sleeping arrangements.
These larger tents allow flexibility in sleeping arrangements with distinct rooms or zones for separation and privacy. Also, consider any desire for accessory expansions like annexed screen rooms or storage capacity for personal belongings you wish to keep secure.
Step-By-Step Guide to Setting Up Your Rooftop Tent
Below is a step-by-step guide on how to set up your rooftop tent;
1. Preparing your vehicle
When setting up your rooftop tent, assess the terrain suitability before unpacking. Look for a level clearing that spans about 16 ft x 8 ft to fully accommodate the tent’s footprint when deployed. Angle your vehicle straight into the space rather than parking on a side slope or tilt, avoiding any uneven ground that would tilt the tent to one side or require added effort to adjust leveling.
Ensure around 7 to 8 ft of clear vertical clearance above the roof, free of overhanging branches or wires that would obstruct tent extension. Taking a few minutes to scan both horizontally across the site as well as vertically all around the rig will prevent the hassle of having to prematurely break it all down to move and reset if the space proves unsuitable. Once the camp area checks all points for tent compatibility, you can then confidently unlatch the rooftop case and unpack without concern.
2. Unfolding and securing the tent
With the vehicle positioned and the environment confirmed, disengage all rugged case latches and brace, assisting with lid lift force if struts don’t auto-activate. Unclip all hook or strap points securing the tent inside the case, then lift the lid fully until the reaching angle stops engaging.
Shake out bedding and sleeping bags stored during transit and install floor foam pads for cushioning. Later, unfurl the integrated rainfly once the footing inside remains stable, taking care of orienting coverage above doorways.
3. Installing additional accessories
Integrated lighting should be installed along roof ridges and perimeter railings when setting up a rooftop tent. This lighting helps prevent accidental falls at night. During the initial tent installation, the lighting strands must be secured into mounted grommets and tensioned stability lines.
Similarly, accessories require attachment after the tent is positioned. Use compatible mounting plates and floor stabilizers to add shoe lockers, solar panels, or enclosed screen rooms.
Wrapping Up
Thoughtfully integrating rooftop tents atop compatible vehicles removes forced choices between physical comfort and immersive expeditions. Blending backcountry wanderlust with squared-away sleeping lofts betters equips explorers chasing destinations roads-less-traveled.
With clever popup shelters expanding high vantage sanctuaries in minutes, rooftop tents invite travelers to break from traditional tenting’s exposure and hardships.

Tech Hub Digital, a one-stop destination for complete technology-related information.

